Heading out into the wild on your mountain bike is supposed to bring a smile to your face and there aren’t many better sights than a stretch of pine-flanked, sun-dappled single track. But did you know it’s possible to increase fun even more?
The answer is by improving your mountain bike riding technique. Unlike many other sports, coaching is not commonly undertaken by mountain bike riders, so bad technique and bad habits can develop over time and cause the same issues to reoccur.
It's never too late to drill down in to the basics and, rest assured, many of the world’s best are constantly assessing themselves on these foundation techniques – even pros like Gee Atherton and Greg Minnaar, who I continue to advise. Nailing the core components of riding allows you to scale up the speed and feel that ‘click’ moment when corners start to link together and exit speed suddenly increases from sections. By brushing up your on-bike positioning, cornering, climbing, braking and descending, you’ll be able to shred sections faster, with more control and consistency.
Bad technique and bad habits can develop over time and cause the same issues to reoccur
1. Body position
When we refer to body position on the bike, we are specifically looking at the position you are in when you enter a technical section – not while pedalling along a flat fire road or up a gentle climb. As you enter a downhill section or series of corners, being in a position that will allow you to control the bike and flow in a safe and consistent manner is key. There are a few key points to highlight.
- Head is up and looking a long way down the trail. You may think you are looking ahead, but often people are looking just in front of their front wheel.
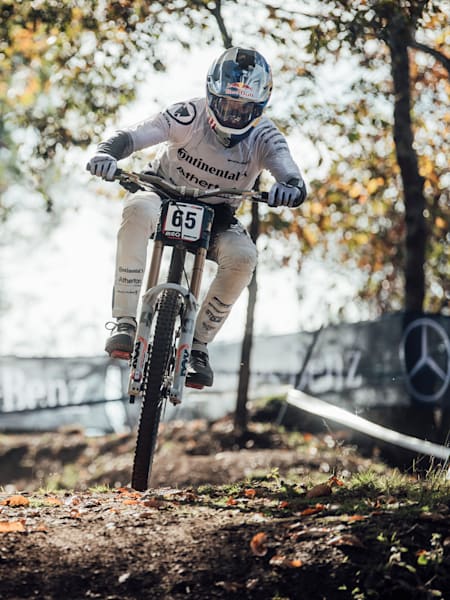
- You are standing up in a position that can remain constant and sustained through rougher terrain – some call this the ‘ready’ or ‘attack’ position. Arms are slightly bent, legs are slightly bent, and torso is upright.
- Wrists are down – slightly rolled back. Riders will often focus on keeping their elbows up, but this can roll wrists forward. Although this position gives a good grip on the bars, it reduces ability to drive force down through the bars to the floor. Roll wrists down, but don’t roll elbows back.
- Heels are dropped. This allows you to transfer forces down and through the bike to the ground and maintain this slight bend in the knee and not crouch. You may need to move your foot position on the pedal to achieve this, and as you ride along flat ground, feel this position of driving heels down without locking knees to see how it differs.
2. Cornering
As the saying goes, ‘jumps are for show, corners are for dough’. It is well accepted that the ability to corner well will make all the difference and gain seconds on the following riders within a very short space of time. There are a few key elements to improving your cornering, and specifically off-road:
- Set your speed before the corner. Braking needs to have taken place before you enter the corner, and not in the corner. Set your speed then get off the brakes.
- You need to look through the corner and commit to the turn with your body – head, shoulders and hips should all follow the line of the turn. Reviewing photos or video will show common faults such as whether the shoulders are turning, but hips haven’t, which shifts your weight and sends you wide in the corner.
- Pedal position varies with the corner, so don’t automatically drop the outside pedal. Most corners ridden when mountain biking will have some sort of rut, berm or bank to them, and in these instances, keeping pedals level is beneficial and balanced. Only when the corner doesn’t have a lot of support, or is off camber, will you need to drop your outside pedal. Many riders coming from road cycling will pre-empt a turn by dropping the outside foot, so try and change this habit.
3. Climbing
What goes down must come up… The thrills of riding downhill are earned with the climbs. Although fire roads make easy climbs, steeper, tighter and more sinuous uphill trails are far more rewarding and direct. Be warned though; they can often catch you out and throw you off balance through lack of grip, spinning the back wheel, or looping out. Consider these points when climbing:
Control is the name of the game when the going gets steep, as many riders rush and attack a climb which causes the back wheel to spin up on a root, or lift up
- Consider saddle height. On steep climbs, lowering the height slightly will help you stay more centred on the bike and stop the front wheel lifting and keep balance and traction. Dropper posts only need a little pump of the lever to drop them a fraction.
- Keep your head up. Looking through the terrain will help you negotiate roots, corners and loose ground.
- Set gearing early and stay seated unless it is very steep or you need a burst of speed. Smooth, steady pedalling is what you need to keep traction up a hill. Just look at motorcycle trials riders – they keep grip at the back wheel and smoothly climb, as opposed to revving and spinning up the back wheel. It sounds obvious, but control is the name of the game when the going gets steep, as many riders rush and attack a climb which causes the back wheel to spin up on a root, or lift up.
4. Braking
Setting your speed is the key outcome here, so choosing the best spots to brake is a skill in itself. Don’t be too hard and jerky on the brakes as this upsets the balance of the bike and will send weight forward and compress the suspension. The best technique is to brake before the technical section or corner begins:
- Don’t be afraid of the front brake and use both to slow the bike – on downhill sections, the front brake is key to slowing down without skidding.
- Maintain the ‘ready’ position on the bike – staying centred with heels dropped and head up will give consistent braking. Throwing weight back to slow down (as sometimes taught on road) will often lose grip on the front wheel off-road.
- It’s important to know when not to brake too! Mid-corner will send you to the outside of the corner, across roots will often make the tyres slip, and if riding a rocky or technical section, it may cause the front wheel to drop into a divot between rocks or roots and send you off balance.
5. Descending
Arguably the part of mountain biking we get the biggest thrill from, downhill sections can cause a lot of stress for some if they are technical or steep. This is often because they lose their position on the bike. When it gets steep, you can react by putting your weight behind the back wheel, which causes the front wheel to lose grip, so you brake more, which causes the front wheel to slide more and thus make a cycle of fear on steep sections increase. It’s easy to fix though:
Don’t brake sharply during the downhill section, as this can put the bike off-balance, skid, or may make negotiating the section harder
- Stay tall on the bike (unless extreme steep drop) as this will keep grip on the front wheel too when braking.
- Look forward towards the end of the section and where it levels out, as you know this is where you can find more grip and slow down on the run out.
- Stay smooth on the brakes and try to set speed before the downhill section. Don’t brake sharply during the downhill section, as this can put the bike off-balance, skid, or may make negotiating the section harder.
- If looking to increase your confidence, there’s no shame in starting small and building up to bigger, gnarlier descents.


